
Warm Rose Embroidery
- Aug 1, 2020
- 2 min read
Updated: Jun 8, 2021
DMC Thread Colors Used:
Silvery Blue - 415
Dark Coral - 436
Gold - 833
Brown - 838
Green - 370
Stitches Used:
Materials:
Other Notes:
* I used all 6 six strands of the embroidery thread throughout the project * For the French Knots I wrapped the thread twice around the needle

The first thing I did was print out my template (below), tape it to the back of my hoop/fabric, hold the hoop up to a window and trace my template lightly onto the fabric. (I didn't end up drawing the small circles towards the bottom.) You could also try holding your fabric up to your computer monitor or iPad!

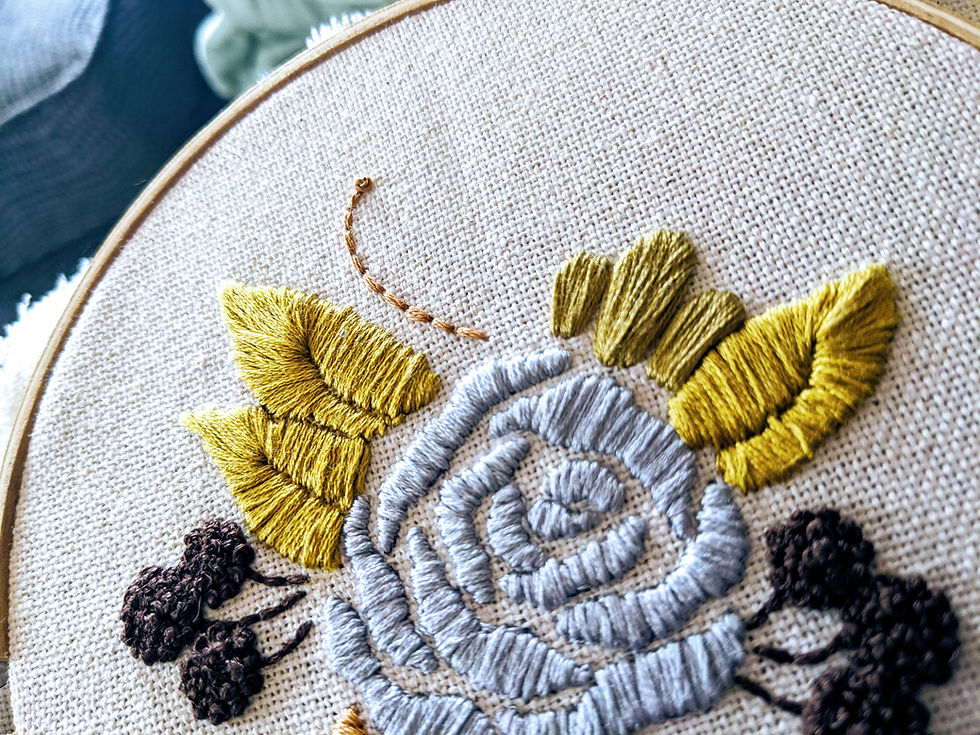
After that I used the Satin Stitch to start filling in my rose petals with the silvery blue color (415). This was probably the most time consuming part!

I used Satin Stitch for leaves as well with the gold color (833). I was able to start on one side of the leaf and then make my way all the way around to the other side by stitch from the edge to the center line. See images below for a visual explanation!


Satin Stitch again for the dark coral flower (436). I did one petal at a time so that I could keep my thread lines going towards the center of the flower. If you are having problems with this it may help to draw yourself some guidelines inside the flower since they will be covered up soon anyways!


I used French Knots to fill in the center of the flower in brown (838). I started with the outer edge of the circle and then worked my way in. This helps gives the center of the flower more height than the outer edges which I like!

Next I added the stems for the little brown ploofy things (that's gotta be the scientific term right?) using the Back Stitch and then French Knots for the tops.


You can tell from my photos that I originally planned to stop here but I didn't feel like the visual was complete yet so I added some green leaves (370) to the bottom right section with the Satin Stitch. Then I added some dark coral sprays (436) using the Back Stitch and then covering it with French Knots.
After that it finally looked complete!
And bonus, it looks super cute on my desk!

All tutorials shown on www.LaurenChaseCo.Com are intended for personal use only. You are not permitted to sell your finished embroidery hoop that was made based on this tutorial


Comments