Adventure is Calling Hoop
- Lauren Chase
- Dec 10, 2021
- 3 min read

DMC Thread Colors Used:
Mountain Blue - 3768
Light Green - 936
Dark Green - 935
Coyote Brown - 840
Yellow Green - 733
Stitches Used:
Materials:
Other Notes:
* I used all 6 six strands of the embroidery thread throughout the project
* For the French Knots I wrapped my thread twice around the needle
My cousin in law recently had a baby and the nursery theme is "Woodland" which I am just the MOST on board with so I just had to make the new little babe an adventure embroidery hoop!
To start my embroidery the first thing I did was transfer my template to my fabric by printing out my template (below), taping it to the back of my hoop/fabric, holding the hoop up to a window as an impromptu light pad, and tracing it with my fine point sharpie. You could also try holding your fabric up to your computer monitor or iPad! I have been using a light pad recently and I really do like it!

You can trace as much or as little of the pattern as you prefer onto your fabric. I basically traced everything but the trees for this one since I knew I was going to be using darker colored threads (when I use lighter colors it is harder to hide my tracing lines, I guess that is where disappearing ink comes in handy!).

Time to start stitching! Trees first!
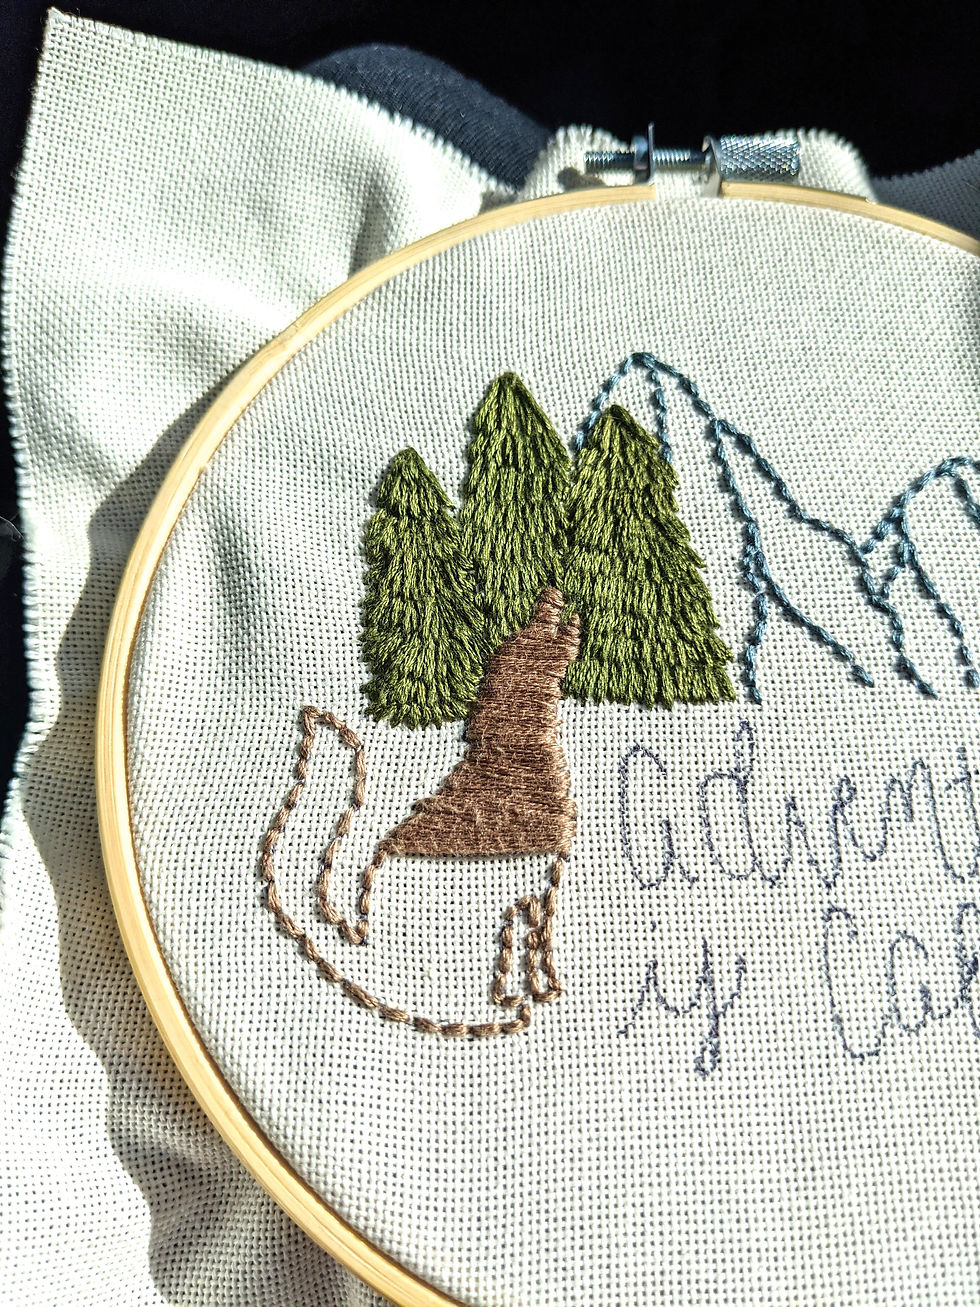
For the trees I used a simple Back Stitch in my lighter green (936) and created rows of downward stitches for the pine boughs. Then I continued up to the next row until the tree was nice and full! (Once again notice that all my pictures are in the car because I love road trip projects!)


Next I used the Back Stitch to outline my mountains in a grayish blue (3768). Originally I was going to leave them just as outlines but then at the end I decided to fill them in with a Satin Stitch, so you could do that now or later depending on how you roll.

Next I used the Back Stitch to outline my coyote in brown (840). I still can't decide if he is a wolf or coyote, they both howl so I guess it's up to you!

Then I used the Satin Stitch to fill in the coyote/wolf fellow. I started in the middle of the coyote and worked my way up first because this is the easiest way for me to keep my stitches going straight across.

Then I finished up his bottom half.

And lastly, his tail!

Then I used the Back Stitch to stitch the "Adventure is Calling" phrase in a yellow green (733). Don't forget to dot your "i" with a French Knot (I only wrapped the thread around my needle once for this dot.)

Next I started adding some base foliage with French Knots to the bottom of the trees using the darker green color (935). I wrapped the thread around my needle twice for these french knots because I didn't want them to be too small or too big. Two was just right.

My original plan was for this to be the final product and I think I could have ended it there if I wanted to but I decided that the mountains weren't present enough in the design and to fill them in with the Satin Stitch. I made my stitches going down in the direction that the different faces of the mountain would fall to add dimension the them.

Then of course I felt like the French Knots should be carried across the base of the mountains too because french knots are fun! I think I probably could have left them out though and I still would have liked how it looked.
Then my little adventure hoop was done and our road trip was over!


To finish the back I added simple giant stitches to the back about half and inch from the hoop and I didn't tie off or cut the thread off yet. Then I trimmed off the edges, still not trimming or tieing off my thread! Then I pulled the thread tight to pull the fabric around the back of the hoop and tied the thread off and trimmed it! Example pictures at the end of this blog post.
All done! If you make your own version of this tag me on insta because I would love to see it!
All tutorials shown on www.LaurenChaseCo.Com are intended for personal use only. You are not permitted to sell your finished embroidery hoop that was made based on this tutorial.


Comments